If you’ve just bought a freeze dryer, start by cleaning the chamber, rack, trays, and gasket. Before freeze drying any food, run a “bread run” test cycle to remove any new-machine smell and confirm the system is functioning properly. For your first real batch, choose simple foods like fruit, candy, or fully cooked meat. Pre-freeze whenever possible to shorten cycle time and improve results, and avoid high-fat and high-sugar foods that don’t dry or store well. Before packaging, confirm the food is completely dry. Store freeze dried food in Mylar bags with oxygen absorbers for long-term shelf life, or vacuum-sealed mason jars for short-term use.
Table of Contents
- What should I do first after setting up my freeze dryer?
- What foods freeze dry best for beginners?
- Do I need to pre-freeze food?
- What foods don't freeze dry well?
- How full should I load my freeze dryer trays?
- How long does a freeze drying cycle take?
- How do I know if my food is fully dry?
- How do I store freeze-dried food?
- FAQs
Introduction
If you’ve just purchased a freeze dryer, congratulations—your journey into long-term food preservation officially begins. The excitement is real, but before running your first batch, a little preparation will make your experience smoother and far more enjoyable.
What should I do first after setting up my freeze dryer?
Step 1: Clean All Components Before Your First Food Load
Before running any food cycles, take time to thoroughly clean the interior parts. Clean these items with warm water and a mild soap:
- Vacuum chamber (wipe interior walls)
- Chamber rack
- All stainless-steel trays
- Door gasket (light wipe only; don’t soak)
Dry all components fully before use.
Step 2: Start with the Bread Run
Your very first cycle should not be food. Instead, you’ll run what’s commonly called a bread run — simply placing sliced bread (or nothing at all) into the machine and running a short, basic cycle.
This does two important things:
- Removes the “new machine smell.” Brand-new vacuum chambers, racks, and internal components have a slightly industrial smell when they first heat up. The bread run neutralizes that so your real food won’t absorb any odors.
-
Confirms everything is working properly. The bread run verifies:
- Your freezer coils are cooling correctly
- Your vacuum pump is pulling down to the right pressure
- The heating pads cycle on and off normally
- The sensors are communicating with the software
Think of it as a “test drive” for your freeze dryer.
What foods freeze dry best for beginners?
Your first real freeze-dried batch should be something simple and forgiving. Avoid tricky items until you have a few cycles under your belt. Some great beginner foods include:
- Strawberries
- Apples
- Bananas
- Cooked vegetables
- Leftover cooked meals
- Shredded chicken
- Ground beef (cooked and drained)
- Candy
For items with thick skins (like blueberries, grapes, cherries, cranberries, cherry tomatoes), make sure to pierce the skin or halve them. This allows moisture to sublimate out during the vacuum process.
For expert tips and recipes, check out our best-selling Freeze Drying Cookbook: complete with hundreds of tried-and-true recipes from real freeze driers.
Do I need to pre-freeze food?
We highly recommend pre-freezing your food. You don’t have to pre-freeze, but it makes a big difference. Pre-freezing improves:
- Drying speed: By pre-freezing your food before it goes into the freeze dryer, you’re skipping the majority of the machine’s freezing phase. That means shorter cycle times and more efficient drying – which saves you energy costs and prolongs your machine’s lifespan.
- Texture: When you freeze quickly, you form smaller ice crystals. That helps maintain the texture, structure, and appearance of your food.
- Uniformity: Putting unfrozen food into a freeze dryer can lead to inconsistent results. You may end up with a product that’s dry on the outside but still has moisture trapped inside. Pre-freezing ensures everything dries evenly from start to finish.
- Flavor retention: Quick freezing preserves color, taste, and nutrients so your food stays fresh and flavorful—even months later.
Lay your food on trays and freeze them in a deep freezer before running the load. You can also use accessories like our stackable tray lids or corner stackers to maximize space during the pre-freeze process.
If you cannot pre-freeze: No problem—your cycle will simply run longer.
What foods don’t freeze dry well?
These foods either do not dry, will melt, turn to syrup, or turn rancid in storage:
How full should I load my freeze dryer trays?
Place food on trays in an even, level layer. Rule of thumb: Food should sit below the lip of the tray. Overloading your trays can lead to:
- Long cycle times
- Cold/wet centers
- Improper drying
- Increased risk of spoilage during storage
Underfilled trays are better than overfilled trays, especially for beginners.
How long does a freeze drying cycle take?
A typical beginner batch might take 18-36 hours, or longer if the food is not pre-frozen. Resist the urge to open the door mid-cycle – it breaks the vacuum and prolongs drying.
How do I know if my food is fully dry?
Making sure your food is fully dry before storing it is incredibly important. If the food is not completely freeze dried, not only will you have wasted food, time, and money, but you can get extremely sick from improperly freeze dried items. There are several methods you can use to make sure your food is fully dry: the weighing method, reading mTorrs, infrared thermometers, and using your senses.
Weighing Method
The most reliable and most certain way of zero moisture in your food is to weigh the trays. Take the weight of your trays, add more dry time, and weigh again when that extra dry time is complete. If the weight is less, you still have moisture that needs to be released. Once your weight is the same before and after, you have removed all the moisture. Add dry time if needed, and if in doubt, weigh and repeat until the weight does not change.
Read the mTorr
When your cycle is complete, your freeze dryer screen will show the current mTorr level. If that level falls below 200 mTorr, you’ll know the food is dry and crumbly.
Use an Infrared Thermometer
Many freeze drying enthusiasts use Infrared thermometers to get a reading in the middle of food. The ideal temperature for food that has just completed the cycle should be 65-100 degrees + or -. If the thermometer drops significantly in one area, or there is a spot that is still below freezing temperature (30’s or lower), then you need to add more dry time.
Use your senses
Touch the food and if there are thick areas, break them in half and feel them. You can also feel the trays when they come out of the freeze dryer. If they are cold, you need to add time. You want the trays to be warm to the touch. You can also use your sense of sight. Fully freeze dried food will usually look different than something that needs more dry time and if there is any moisture present, there will be spots on the tray that are a different color.
Add Extra Dry Time
When in doubt, add more dry time! The goal is ZERO moisture, no exceptions. It’s not possible to “over dry” or “over freeze dry” your food.
How do I store freeze-dried food?
Once your food is successfully freeze dried, your job isn’t done — in fact, proper storage is just as important as the freeze-drying process itself. If freeze-dried food isn’t stored correctly, shelf life drops dramatically. Done right, though, your food can remain shelf-stable for decades.
What to avoid when packaging and storing freeze dried food
- Moisture: Moisture is the fastest way to ruin freeze-dried food. If your food has any remaining moisture (or absorbs moisture during storage), the countdown to spoilage begins immediately. Store your food in a room with as little humidity as possible, and always store freeze-dried food at least 6 inches off the ground.
- Light: Light doesn’t “contaminate” food, but it absolutely destroys quality over time. Exposure to light — natural or artificial — breaks down nutrients and can cause colors and flavors to fade.
- Oxygen: Removing oxygen is a non-negotiable rule of long-term food storage. Otherwise, you can introduce oxidation, rancid fats and oils, microbial growth and more. The two most highly effective tools for eliminating oxygen are Oxygen Absorbers and Chamber Vacuum sealers.
Best packaging for freeze dried food storage
The packaging we recommend for freeze dried food depends on whether you’re storing the food for short-term or long-term use.
- Long-Term Storage: Use Mylar Food Storage Bags with Oxygen Absorbers. Heat-seal the bags and store them in a cool, dark, dry place to keep food fresh for up to 25 years.
- Short-Term Use: Vacuum-sealed Mason Jars with Oxygen Absorbers work great for frequently used items, like fruits and snacks. Keep in mind that Mason Jars are susceptible to light, which deteriorates the quality of freeze-dried food over time.
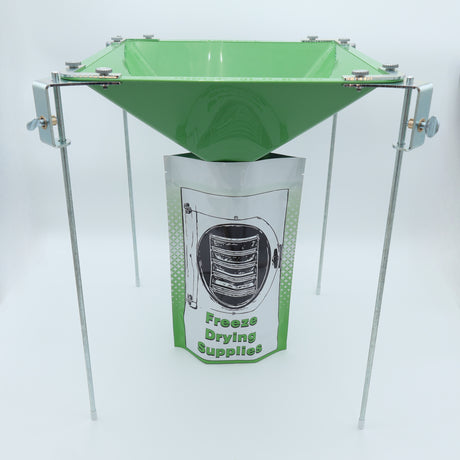
Check out our Food Storage Starter Kit for everything you need to store freeze dried food: Mylar Bags, Oxygen Abosrbers, and our best-selling Food Funnel.
Freeze Drying FAQs for First-Time Owners
What should I do first after setting up my freeze dryer?
Clean the chamber, rack, trays, and gasket, then run a test cycle (often called a “bread run”) before freeze drying food. This helps remove new-machine odors and confirms the freeze dryer and vacuum system are working properly.
What foods freeze dry best for beginners?
When food is fully dry and stored correctly (low moisture, low light, low oxygen), it can remain shelf-stable for decades—often cited as up to 25 years for long-term storage when packaged properly.
Do I need to pre-freeze food?
Pre-freezing is strongly recommended. It typically shortens cycle time in the freeze dryer, improves texture of the food (due to smaller ice crystals), and helps food dry more evenly and consistently.
Which foods don’t freeze dry well?
Very high-fat, oily, or sugar-heavy foods are usually poor candidates because they don’t freeze/dry properly or can become unstable in storage. Examples include oils, butter, peanut butter, mayonnaise, heavy cream, honey, and syrup.
What foods are best for freeze drying long term?
Fruits, vegetables (often blanched), lean meats (trim fat first), low-fat dairy, eggs, herbs, cooked grains/pastas, and low-fat leftovers generally freeze dry well and store well when packaged correctly.
How full should I load my freeze dryer trays?
Load food in an even, level layer below the tray lip. Overloading can cause longer cycles and cold or wet centers. When in doubt, underfill rather than overfill.
How long does a freeze-drying cycle take?
A typical beginner batch often takes about 18–36 hours, and it can take longer if the food wasn’t pre-frozen. Avoid opening the door mid-cycle because breaking the vacuum can extend drying time.
How do I know if freeze-dried food is fully dry?
Use at least one reliable check before packaging. Common methods include weighing trays before/after extra dry time, checking mTorr readings, using an infrared thermometer for cold spots, and using your senses (break thick pieces apart to see if there are still wet spots; trays should feel warm, not cold). If unsure, add more dry time.
What packaging is best for freeze-dried food?
For long-term storage, use Mylar bags with oxygen absorbers and heat-seal them, then store in a cool, dark, dry place. For short-term/frequent use, vacuum-sealed mason jars with oxygen absorbers work well, but protect jars from light exposure.
How long does freeze-dried food last?
When food is fully dry and stored correctly (avoiding moisture, light, and oxygen), it can remain shelf-stable for decades—often cited as up to 25 years for long-term storage when packaged properly.